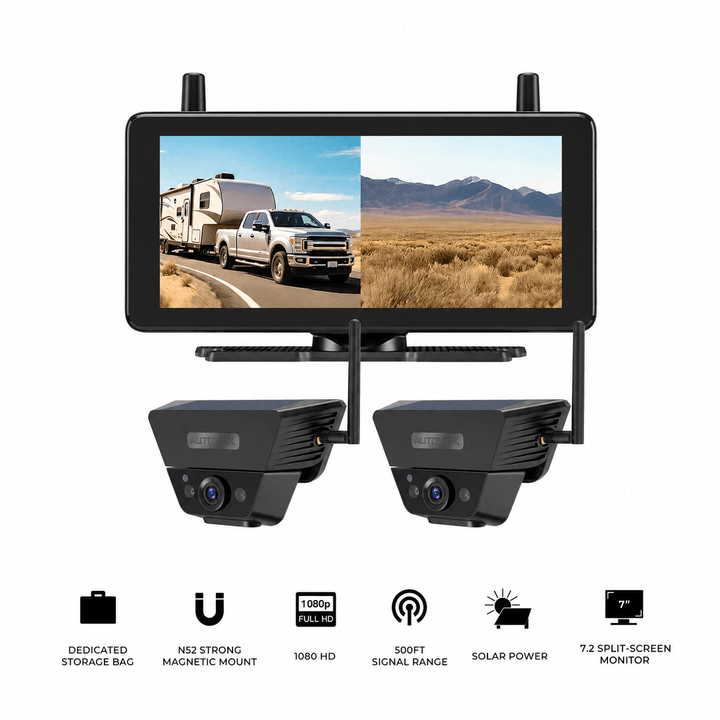
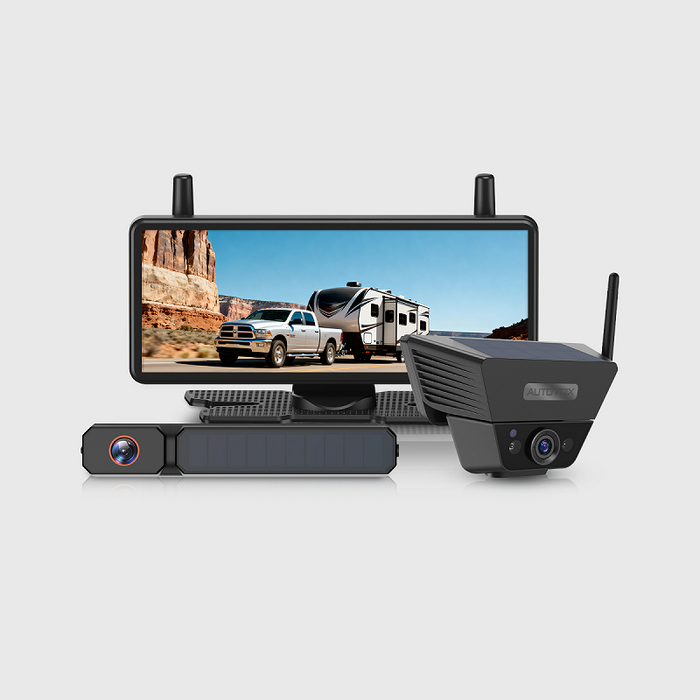
Sun-Powered Freedom. Zero Wiring Required.Install in just 60 seconds—no drilling, no auto-shop fees. Powered by continuous solar charging and ultra-stable signal transmission, it’s the ultimate hassle-free upgrade for every vehicle.
Real-Time HD Clarity. Signal That Never Flinches.Powered by AutoLink™ 2.4GHz technology, experience zero-lag 1080P live stream across long vehicles. Plug, play, and drive with unshakeable clarity.
Classic connection, ultimate reliability. Hardwired setup ensures real-time, interference-free video at all times. Built for families who value consistency and durability.
It’s bright and crystal clear so you can see details like license plate numbers.
Testsieger ist die Auto-Vox Solar 3A Plus: stabile Signalübertragung und tolle Bildqualität, bei Tag und Nacht.
Recognized across the Harvest Hosts RV community for life on the road.
T9Pro:すっごく映像が綺麗で肉眼で見ているくらい
Dank kabelloser Anbindung lässt sich die Rückfahrkamera leicht nachrüsten, ohne ein Kabel aufwendig durch den Innenraum zu verlegen.
It’s bright and crystal clear so you can see details like license plate numbers.
Testsieger ist die Auto-Vox Solar 3A Plus: stabile Signalübertragung und tolle Bildqualität, bei Tag und Nacht.
Dank kabelloser Anbindung lässt sich die Rückfahrkamera leicht nachrüsten, ohne ein Kabel aufwendig durch den Innenraum zu verlegen.
T9Pro:すっごく映像が綺麗で肉眼で見ているくらい
Recognized across the Harvest Hosts RV community for life on the road.
19 Years of Engineering Safety into Every Journey.
Since 2007, AUTO-VOX has pioneered wireless vehicle technology. Trusted by over 10,000,000 users across 20+ countries, we don’t just build cameras—we eliminate driving anxiety so you can focus on the road ahead.
“This camera was recommended to me by a friend who has these on his camper. I got the twin pack with 7” Monitor. The clarity and camera range is impressive , especially infra red night mode , allowing some interesting viewing from inside the vehicle at night time. The product quality is fantastic , built to last , definitely “ex squaddie proof” too. ”
Jerry
⭐️⭐️⭐️⭐️⭐️
“I don't usually write reviews, but I must in this case! ! had some trouble at first. These folks walked me through and even sent replacement equipment. Awesome!! Very good quality...clear, easy to instaall.. ”
Adan
⭐️⭐️⭐️⭐️⭐️
“I use it on the back of my pickup, and it makes lining up the tow ball with the caravan hitch much easier. The picture on my phone is clear, and I can usually get everything lined up first time without jumping in and out of the cab. A really handy bit of kit.”
John
⭐️⭐️⭐️⭐️⭐️
“I recently purchased the back-up camera for our new RV. It was easy to install in the location identified by the rv manufacturer. It comes with a nice gasket to seal the location from water. I also used some clear caulk as additional protection. The camera works well and customer support was very fast for a technical question that I had. style of mounting.”
sgallery
⭐️⭐️⭐️⭐️⭐️
“I purchased a back up camera from my Rv last year September 2023 and was so impressed I opted to purchase another one to use as a trail camera on the front of my jeep while offroading for this year while we are in Arizona, important to see what you are about to go over before you actually climb onto it.”
Sandra
⭐️⭐️⭐️⭐️⭐️
“This is perfect for an older car that doesn't have a camera. Great for long vehicles like RVs or trucks. My sister says she's gonna borrow it to try on her school bus. It's easy to install and set up. Has a clear picture. It has a heavy duty case for storage when not in use. It makes a great kitty cam too.”
For budgeting purposes, a straightforward professional backup-camera installation in the U.S. commonly falls around $150–$400, depending on the truck, system and what the quote includes. More complicated factory-screen or multi-camera projects can reach $600 or more.
A truck camera installation can be a quick weekend project or a job that takes several hours of professional labor.
The difference usually has less to do with the camera's retail price and more to do with the installation itself.
A rechargeable magnetic camera with a standalone monitor may only need initial setup and a suitable mounting position. A fixed wireless camera still needs a power connection at the rear of the truck. A wired camera adds a cable route from the rear body to the cab. Dual- and multi-camera systems add more mounting points, power connections, channels and testing.
The type of truck matters too. Installing one camera on a pickup is very different from routing three cameras around a long box truck, utility body or specialty vehicle.
This guide explains where that money goes, what DIY really costs, and how to decide when professional installation is worth paying for.
Cost note: The figures in this guide are U.S. planning ranges rather than fixed installation prices. Labor rates, truck construction, electrical systems, required adapters and local shop pricing can change the final quote substantially.
How Much Does Truck Camera System Installation Cost?
The simplest way to budget a truck camera is to separate the product price from the installation cost.
A useful formula is:
Camera system + display + vehicle-specific parts + wiring materials + installation labor + testing or fabrication.
A standard professional rear-camera installation may start around the low hundreds in labor. Current consumer installation services provide a useful benchmark near $150 for a straightforward camera installation with hardware purchased separately. Broader industry estimates commonly place standard installations around $150–$400.
That range expands quickly when the system adds multiple cameras, factory-display integration or unusual cable routing.
Camera Setup
Typical Installation Pattern
Main Cost Driver
Rechargeable magnetic rear camera
Lowest labor requirement
Mostly hardware and setup
Fixed wireless rear camera
Basic installation tier
Rear power connection + mounting
Wired rear camera
Moderate labor
Long signal-cable routing
Rear camera + mirror or factory display
Moderate to higher labor
Display integration and adapters
Dual-camera system
Higher than comparable single-camera installation
Second mount, power route and channel
Three- or four-camera system
Usually custom quoted
Multiple routes, power connections and display setup
What Makes One Installation More Expensive?
Several factors consistently increase labor.
Camera count. Every additional camera needs a mounting location, a power plan, signal connection, aiming and testing.
Truck length. A long box truck requires more cable, more attachment points and more protection than a pickup with the camera only a few feet behind the cab.
Wired versus wireless video. Wired systems require a physical signal path from the rear camera to the display. Wireless video removes that long signal cable and can reduce trim removal and routing time.
Power source. A rechargeable camera avoids permanent rear power wiring. A fixed camera may need the reverse-light circuit, an ignition-switched source or another supported power connection, depending on how the camera is intended to operate.
Display type. A camera kit with its own monitor is generally easier to install than a system that must integrate with the factory infotainment screen. Factory integration may require a vehicle-specific interface, wiring harness or signal adapter.
Drilling and fabrication. New holes in metal require more than a drill bit. The installer needs to confirm what sits behind the panel, protect exposed metal against corrosion and seal the mounting area against water.
Existing equipment. Replacing an old camera can create diagnostic work. The shop may need to determine whether the camera, cable, display or power supply caused the original failure before deciding whether existing wiring can be reused.
Single Camera vs. Dual and Multi-Camera Systems
A single rear camera has the simplest architecture:
Camera → power → video signal → display.
A second camera adds a second mounting position and another power or battery arrangement. The display also needs a second channel and a practical way to switch or show both views.
A three-camera truck system might use:
one rear camera
one left-side camera
one right-side camera
A four-camera system can add another rear, cargo, bed or front-area view.
The labor increase is rarely a simple “single-camera labor × number of cameras” calculation. Side cameras often require different routing from a rear camera, and multi-channel displays may need trigger configuration or additional setup.
Pickup, Van, Box Truck, and Utility Body Costs Differ
The body behind the cab can influence installation cost as much as the camera itself.
A pickup using a backup camera for truck application often has a relatively short path between the rear bumper and cab. Common mounting positions include the license-plate area, tailgate or rear bumper.
A cargo van introduces rear doors, hinges, interior trim and a longer enclosed body.
A utility or service truck may have toolboxes, ladder racks, auxiliary lighting and equipment occupying the area where a camera would normally mount.
A box truck creates a longer camera-to-cab distance and more exterior cable exposure. A wired system may require additional cable protection, while a wireless system should be evaluated for the actual body length and proposed camera location.
Dump trucks and other moving-body trucks deserve additional planning because cables must stay away from pivot points, hydraulic equipment and moving structures.
Does Wireless Reduce Installation Cost?
It often does.
A wireless backup camera transmits video without a long signal cable running from the camera to the dashboard. That can reduce:
interior trim removal
front-to-rear video cable routing
firewall or cab-entry work
the amount of cable that needs to be concealed and protected
A fixed wireless camera still needs power. The installation may include a reverse-light or another approved vehicle-power connection.
Rechargeable wireless cameras reduce the permanent installation further because the camera carries its own battery.
Solar-assisted charging on AUTO-VOX solar models is supplemental charging. Battery status and normal charging remain part of routine use.
Factory Screen, Dedicated Monitor, or Mirror Display?
The display choice can significantly change labor.
A standalone monitor included with the camera kit usually has its own power cable and avoids integration with the truck's infotainment system.
A factory screen may need a vehicle-specific interface or adapter.
A rearview mirror backup camera creates another installation path because the mirror/display needs to be fitted and powered while camera wiring is routed to it.
Factory integration can look cleaner, though the required interface hardware may cost more than a standalone monitor.
Hidden Costs to Include in the Budget
Small installation parts can add up, particularly in DIY projects.
Possible extras include:
extension wire or camera cable
fuse taps
connectors and heat-shrink tubing
wire loom or conduit
grommets
mounting brackets
trim clips
weather sealing
corrosion protection
factory-display adapters
removal of old equipment
Trailer and hitch applications can also change camera placement. A camera aimed at the hitch may provide a different perspective from one aimed farther behind the truck.
Cost shortcut: Camera count, truck length, power source and display type usually explain most of the installation price. Define those four items before comparing quotes.
DIY vs. Professional Installation: Which Makes More Sense?
DIY is most attractive when the installation path is obvious and the system requires few permanent vehicle modifications.
Professional installation becomes more valuable as the project adds wiring, fabrication and vehicle-specific electronics.
Installation
DIY Suitability
Professional Installation Value
Rechargeable magnetic camera
High
Usually limited
Fixed wireless rear camera
Good with basic automotive wiring skills
Useful when power wiring is unfamiliar
Wired single rear camera
Moderate
Useful for clean concealed cable routing
Factory-screen integration
Vehicle-specific experience recommended
High
Dual fixed-camera installation
Moderate to advanced
Higher as routing complexity grows
Three- or four-camera system
Advanced
Often worthwhile
Box / utility / specialty truck
Depends heavily on experience
Often worthwhile
What DIY Really Costs
DIY removes the shop labor charge, although the project still has real costs.
Depending on the installation, you may need:
multimeter
wire stripper and crimper
trim-removal tools
drill and bits
additional wire
connectors
wire loom
grommets
sealant
mounting hardware
Your time belongs in the comparison too.
A first-time wired installation can take several hours because the longest part of the project is often finding a clean, protected route through the truck and then reassembling everything.
DIY usually makes sense when:
the system uses one camera
the mounting position is clear
the kit includes a standalone monitor
little or no drilling is needed
the power source is understood
the cable path is easy to protect
the manufacturer provides clear installation instructions
When Professional Installation Is Worth Paying For
A professional installer becomes more useful when the system involves:
factory infotainment integration
multiple permanently mounted cameras
long front-to-rear wiring routes
side-camera trigger wiring
custom brackets
drilling into metal body panels
moving commercial-truck bodies
an unfamiliar electrical system
Commercial trucks also make consistency important. Fleet operators often benefit from having every vehicle use the same camera positions, cable paths and service approach.
Another practical issue is vehicle voltage. Pickup trucks and larger commercial trucks can use different electrical architectures. Confirm that the camera, monitor and adapters support the actual vehicle before connecting them.
When the electrical system is unclear, professional assessment is the more sensible route.
How to Get an Accurate Installation Quote
A useful quote starts with more information than “I need a backup camera installed.”
Give the installer enough detail to understand the whole system.
Information
What to Provide
Truck
Year, make, model and body type
Vehicle length
Approximate overall or body length where relevant
Camera count
Single, dual, three-camera or other layout
Camera type
Wired, fixed wireless or rechargeable wireless
Display
Standalone monitor, mirror display or factory screen
Intended view
Rear, hitch, truck bed, side, trailer or continuous rear view
Mounting
Preferred camera position and whether drilling is acceptable
Existing equipment
Factory or aftermarket camera currently fitted
Then ask what the quote actually includes.
Is the camera hardware included?
Are wiring materials included?
Are adapters or interfaces included?
Does the price cover drilling and weather sealing?
Does it include corrosion protection around new holes?
Is removal of old equipment included?
Is testing included?
Does the shop warranty its installation workmanship?
A lower base price can become more expensive once vehicle-specific parts and additional labor are added. Comparing complete quotes gives a much clearer picture.
Different truck camera designs illustrate why installation cost can vary so much.
A portable rechargeable setup can keep installation close to the hardware cost. A fixed wireless system requires more vehicle integration. A dual-camera system adds another selected view without necessarily requiring two long hardwired video routes.
Product
Installation Style
Cost / Labor Profile
Solar5B
Rechargeable magnetic camera + monitor
Low permanent-installation requirement
Solar3A Plus
Rechargeable wireless camera + monitor
DIY-friendly rear-view setup
W7 Pro
Fixed wireless video + vehicle-powered camera
Less video-cable routing, rear power connection required
Solar5C Dual
Rechargeable dual-camera system
Two selected views with relatively limited permanent wiring
The Solar5B is useful when minimizing permanent installation is a priority. Its magnetic camera and rechargeable battery reduce the need for rear wiring.
Solar3A Plus follows a similar low-complexity approach with a rechargeable wireless camera and dedicated monitor.
The W7 Pro represents a more permanent installation style. Video is transmitted wirelessly, while the camera uses vehicle power. This reduces the long signal-wire run while keeping the camera ready whenever its supported power circuit is active.
Solar5C Dual illustrates another cost path: two selected camera views using rechargeable cameras can add viewing flexibility without creating the same wiring workload as two permanently hardwired cameras.
Prices and configurations may change. Confirm the current product page, selected configuration, truck compatibility, mounting method and power requirements before purchase.
Frequently Asked Questions
How much does it cost to install a backup camera on a truck?
A straightforward professional installation commonly falls around $150–$400 in the U.S. Hardware, truck type, cable routing and local labor rates can move the final price higher or lower. Complex multi-camera and custom installations may exceed $600.
Does professional installation include the camera?
It depends on the installer. Some published installation services charge for labor separately and require the customer to purchase the camera and required vehicle-specific parts. Confirm hardware, labor and materials separately before comparing quotes.
Is a wireless backup camera cheaper to install?
Wireless video can reduce labor because a long signal cable does not need to run from the rear of the truck to the monitor. Fixed wireless cameras may still require vehicle power. Rechargeable wireless cameras can further reduce permanent wiring.
How much does a dual-camera system cost to install?
There is no universal dual-camera installation price. A second camera adds another mounting point, power arrangement, signal channel and testing process. A rechargeable second camera usually requires less labor than another permanently wired camera.
Can I install a truck backup camera myself?
Rechargeable cameras and kits with standalone monitors are usually the easiest DIY options. Fixed wireless systems can also suit owners with basic automotive electrical experience. Factory-screen integration, permanent multi-camera systems and specialty truck bodies require more installation knowledge.
How long does truck camera installation take?
A straightforward professional single-camera installation may take roughly one to two hours. A first-time DIY wired installation can take several hours. Long commercial trucks, multiple cameras and factory-display integration can require considerably more time.
Final Thoughts: Price the Installation Before You Price the Camera
Truck camera installation cost follows the architecture of the system.
A rechargeable magnetic camera can keep the installed cost close to the camera price. A fixed wireless system reduces front-to-rear video wiring while still requiring a supported power connection. Wired cameras add a physical cable route, and dual- or multi-camera systems add more mounting, power and configuration work.
Truck construction and display choice add another layer. A pickup with a standalone monitor is usually easier to work on than a long box truck using several cameras and a factory display.
Before purchasing a system, answer four questions:
How many camera views do you need?
Where will each camera be mounted?
How will each camera receive power?
Where will the image be displayed?
Those answers give you a realistic picture of both DIY difficulty and professional labor before money is spent.
A simple portable system can make DIY economical. Factory integration, long cable routes, permanent multi-camera systems and specialty truck bodies usually create more value for professional installation.
The driver is operating two connected vehicle bodies: the tractor and the trailer. The combination is long, the trailer pivots at the fifth wheel, mirrors cannot show every area around the vehicle, and the view behind the tractor disappears as soon as a full-size trailer is attached.
A semi-truck camera system has a more complicated job than a typical pickup backup camera.
That is why a useful Class 8 camera system usually starts with several different visibility problems rather than one “backup camera.”
A rear camera can show the area behind the trailer. Side cameras can add left- and right-side context during turns and lane positioning. A closer blind-side or curb-side camera can focus on an area that remains difficult to judge from the driver's seat. Multi-camera systems combine those selected views on one in-cab display.
The exact layout depends on the operation. A day cab pulling the same dry van every day may use a different camera architecture from a sleeper tractor that swaps trailers, a flatbed carrying oversized loads, or a tractor operating regularly in crowded distribution yards.
The most useful question is therefore:
Which areas around the complete tractor-trailer combination are still difficult to see with the existing mirrors?
Commercial-vehicle reminder: Cameras add selected visual information around a tractor-trailer. They do not create complete visibility, change the truck's turning or stopping limits, or replace mirrors, direct observation, walk-arounds, spotters, coupling inspections, or legally required equipment. Follow fleet procedures and applicable vehicle regulations for the actual Class 8 configuration.
What Camera Views Does a Semi-Truck Actually Need?
Large commercial vehicles have significant visibility limitations around the front, rear, and both sides. A camera system works best when each camera is assigned to one specific area instead of trying to make one lens cover the entire combination.
Dock approaches, trailer tracking, close obstacles
Tractor rear / fifth-wheel area
Coupling area behind the cab
Trailer connection and selected coupling checks
Front / curb-side camera
Close area near the tractor nose or passenger side
Urban turns and low-speed maneuvering
Rear Visibility Starts at the Trailer, Not the Tractor
A camera mounted on the rear of the tractor can be useful for the fifth-wheel or coupling area while the tractor is bobtailing or connecting a trailer.
Once a full-length trailer is attached, that camera cannot show the road behind the complete combination.
For that job, the rear-view camera needs to be located on the trailer itself.
A high, centered trailer-rear position is a common starting point because it can provide a wider perspective and reduce immediate obstructions in the field of view.
The camera position should account for:
rear doors
door hinges
lights and reflectors
roof equipment
liftgates where fitted
trailer identification markings
the required cable or power route
When possible, keeping a small part of the trailer's rear edge visible can provide a useful reference during slow backing.
A rear camera remains a visual reference. Distance and clearance still need to be judged through normal commercial driving procedures and direct checks where required.
Side Cameras Solve a Different Problem
A rear camera looks down the centerline behind the vehicle.
Side cameras are aimed along or beside the tractor-trailer combination.
They can be useful when the driver needs additional context around:
the right side during a wide turn
the left or right side during lane positioning
the trailer rear quarter during a dock approach
objects beside the trailer in a congested yard
On a tractor, side cameras may be mounted near the mirror assembly, cab side, or another location that provides the required perspective without creating excessive overlap with the existing mirrors.
Trailer-mounted side cameras serve a different purpose. They can show an area farther back along the trailer, which can become useful on long combinations where the tractor-mounted side view loses detail near the rear portion of the trailer.
Blind-Spot Cameras Should Target a Specific Zone
“Blind-spot camera” is a broad term.
On a semi, useful blind-zone views can include:
the passenger-side area beside the tractor
the right-front curb area
the space beside the trailer
a rear-quarter area near the trailer axles
The mounting position should be chosen around the actual missing view.
Installing several cameras that all show almost the same side angle adds screen clutter without adding much information.
Camera-layout rule: Start with the blind area, then choose the camera position. Rear, side, curb-side, coupling, and trailer-rear views solve different problems.
Rear, Side, and Blind-Spot Camera Placement on a Class 8 Truck
Camera placement becomes more important as the combination grows longer.
A semi-truck system has to account for vehicle height, trailer length, articulation, vibration, trailer doors, cargo type, and the fact that tractors and trailers may not always remain paired together.
Rear Trailer Camera
For a dry van or reefer, the rear camera is commonly placed high and close to the centerline.
A higher position can provide:
a longer rear perspective
a clearer view over low obstacles
less direct exposure to road spray than a low bumper position
The mounting point should stay clear of rear lights and door hardware.
Camera angle matters too. An image aimed too far downward may work well at a dock while providing limited farther-rear context. An image aimed too high may show more roadway while making close backing reference harder.
For fleets using the camera both while driving and backing, the mounting angle usually needs to balance those two uses.
Flatbeds and Specialized Trailers
A flatbed may not have a permanent rear wall at the same height as a dry van.
Cargo height can also change from load to load.
Possible camera locations include:
a protected trailer-rear bracket
a high removable mount
a camera attached to a suitable rear structure
The installation must account for cargo loading, securement equipment, forklift access, and anything that could strike or obscure the camera.
A lowboy, tanker, car hauler, dump trailer, or other specialized trailer should be evaluated around its actual moving parts and operating cycle.
Tractor Side Cameras
Side cameras are most useful when their image complements the mirror rather than simply reproducing it.
A passenger-side camera, for example, can be angled toward a selected area that is difficult to see from the cab during a right turn.
A driver-side camera can provide another perspective during lane positioning or close yard maneuvering.
Mounts must tolerate:
highway vibration
wind load
rain and road spray
truck washing
door or hood movement where applicable
Tractor-to-Trailer Articulation Changes the Image
The tractor and trailer do not remain aligned during a turn.
As the articulation angle increases, a camera mounted on the tractor sees the trailer from a different perspective.
This matters when evaluating side views.
A side camera that looks perfect with the tractor and trailer straight may show much less useful information during a sharp yard turn.
Test camera placement through the normal range of low-speed articulation before making the installation permanent.
How to Build a Multi-Camera Semi-Truck System
A semi-truck system can grow from one camera to several channels very quickly.
The most useful approach is to add cameras only when each channel provides a distinct operational view.
Two-Camera Layout
A basic two-camera system might use:
trailer rear
right-side blind-zone view
This can suit a driver who already has strong mirror coverage and mainly wants help with backing plus one difficult side.
Three-Camera Layout
A common three-view architecture is:
rear
left side
right side
This same rear-plus-two-sides arrangement appears in many large-vehicle camera systems because the three channels provide clearly different perspectives.
A three-camera monitor can display all feeds together in a yard or switch one channel to full screen when the driver needs more detail.
Four-Camera Layout
A fourth camera can be assigned to the operation that matters most.
Examples include:
fifth-wheel / coupling area
right-front curb-side area
cargo or equipment view
second trailer-side view
The right fourth camera depends on the trailer and route.
A regional dry-van fleet may value a curb-side camera. A flatbed operator may want a cargo-facing view. A yard tractor may prioritize the coupling area.
More Cameras Require Better Monitor Planning
Camera count and screen layout should be chosen together.
A 7-inch-class display can work well with two or three channels, especially when the driver can switch between split-screen and full-screen modes.
As channel count increases, each image becomes smaller in multi-view mode.
A practical interface may use:
rear full screen during backing
right-side full screen or triggered view during a right turn
left-side view during selected lane maneuvers
split screen in yards and loading areas
Automatic triggering can reduce the amount of manual screen switching, provided the system and installation support the intended trigger inputs.
Keep the monitor where the driver can glance at it without obstructing the windshield, mirrors, controls, or required safety equipment.
Cameras Supplement the Existing Mirror System
A camera system can expand visual context around the truck.
For ordinary aftermarket installations, keep the required mirrors and use the cameras as supplemental views unless the vehicle is equipped with an approved electronic mirror-replacement system that meets the applicable requirements.
Drivers should continue using normal mirror scans and direct observations even when several camera feeds are available.
Multi-camera rule: Add channels when they provide a new view. Three useful views are more valuable than five cameras aimed at overlapping areas.
Wired vs. Wireless Semi-Truck Cameras: Signal, Power, and Trailer Swaps
A Class 8 combination makes the wired-versus-wireless decision more complicated than it is on a pickup.
The rear of a long trailer can be a substantial distance from the monitor, and the signal path may pass through the trailer structure, cargo, sleeper cab, and other equipment.
Wired Systems
A commercial wired system can provide a predictable signal path when the installation is permanent.
It also requires more installation work.
The cable route may involve:
the full trailer length
protected exterior or underbody routing
connectors between tractor and trailer
flexible cabling around articulation
service loops
weather-resistant connections
For a tractor that stays paired with the same trailer, this can be a practical long-term solution.
For fleets that swap trailers frequently, connectors and installation standards become more important because the camera system has to work every time a different tractor and trailer are paired.
Wireless Systems
A wireless backup camera can reduce long signal-cable routing and make trailer installation easier.
The camera still needs power unless it uses its own rechargeable battery.
Wireless performance should be evaluated on the actual combination.
Factors include:
tractor-to-camera distance
trailer material
cargo
sleeper cab structure
antenna position
nearby RF interference
A 53-foot trailer and sleeper tractor create a very different radio path from a short work truck.
Published open-area ranges are useful specifications, though the real test is the complete truck and loaded trailer.
A Hybrid Layout Can Make Sense
Some operations may benefit from combining methods.
For example:
wired side cameras permanently installed on the tractor
a wireless rear camera installed on the trailer
This keeps the tractor-side channels consistent while reducing the amount of signal wiring that must cross between tractor and trailer.
For trailer-swapping fleets, a standardized wireless rear-camera position and power arrangement can also simplify deployment, provided pairing and compatibility are managed consistently.
Power Planning Is Separate From Video Transmission
“Wireless” describes the video connection.
A fixed trailer camera may use trailer electrical power. A rechargeable camera uses its own battery. Some specialized commercial installations may also include backup power for operation while the trailer is disconnected.
Before connecting an aftermarket camera, confirm:
tractor voltage
trailer voltage
camera voltage range
monitor power requirements
the correct protected circuit
Class 8 vehicles and trailers should never be treated as automatically compatible with a 12V camera system.
Commercial installations should be planned around the electrical system actually present on the truck.
Wireless rule: Wireless removes the long video cable. Power, antenna position, trailer structure, distance, and trailer swapping still need their own installation plan.
Semi-Truck Camera Installation and System Selection Checklist
Before buying equipment, map the complete tractor-trailer combination.
Check
What to Confirm
Operation
Long-haul, regional, yard, flatbed, reefer, tanker, specialized trailer, etc.
Trailer use
Dedicated trailer or frequent trailer swaps
Rear view
Exact area required behind the trailer
Side views
Left, right, curb-side, trailer-side, or rear-quarter areas
Additional view
Fifth wheel, cargo, front corner, or other operational need
Monitor
Number of channels and split-screen modes
Transmission
Wired, wireless, or hybrid architecture
Power
Actual tractor and trailer voltage and available circuits
Complete tractor + trailer + normal load configuration
Articulation
Camera view checked with tractor and trailer at turning angles
Serviceability
Cameras, antennas, connectors, and wiring remain accessible
Test the System Before Calling the Installation Finished
Check the truck in the conditions where the cameras will actually be used:
tractor and trailer straight
tractor and trailer articulated during a slow turn
bright daylight
night or low light
all trailer doors closed
normal cargo or operating configuration where practical
For wireless systems, test image stability at idle and while moving slowly in a controlled area.
For side cameras, verify that mirrors, fairings, trailer corners, and cargo do not block the intended field of view.
For rear cameras, confirm the image still gives useful close reference while showing enough of the roadway for the intended use.
Where AUTO-VOX Fits
AUTO-VOX offers several architectures that can help illustrate the differences between rear-only, dual-camera, and rear-plus-side systems.
For a backup camera for truck application, product selection should still be based on the exact truck length, power system, mounting location, and required signal range.
Class 8 installations deserve additional compatibility checks. Several AUTO-VOX multi-camera systems are designed around RV and trailer use and specify DC 12V operation, so they should only be considered where the actual commercial-vehicle electrical system and installation are confirmed compatible.
For fleet or continuous-duty applications, a purpose-built commercial camera system may be more appropriate.
Product
Viewing Layout
How to Use It as a Reference
CampSync D1
Dual-lens rear + left + right
Example of close/far rear perspectives plus both sides
WF4
Rear + left + right
Example of a three-channel multi-view layout
Solar5B Dual-Camera Kit
Two movable cameras
Example of flexible supplemental rear / side views
Solar5C Dual
License-plate + magnetic camera
Example of two portable selected views with rechargeable cameras
Class 8 compatibility: Verify vehicle voltage, monitor power, camera power, mounting surfaces, trailer length, wireless performance, operating duty cycle, and fleet requirements before adapting any RV- or light-truck-oriented camera system to a semi-truck.
Prices and configurations may change. Confirm current specifications and compatibility before purchase. CampSync D1 and WF4 are DC 12V systems designed primarily for RV and trailer applications; commercial Class 8 use requires separate electrical, mounting, signal, and operational compatibility review.
Frequently Asked Questions
How many cameras does a semi-truck need?
There is no universal number. A basic setup may use one trailer-rear camera, while a more complete system can add left- and right-side cameras. A fourth channel can cover the fifth wheel, curb-side area, cargo, or another operational blind zone. Choose each camera around a specific missing view.
Where should a rear camera be mounted on a semi-trailer?
A high, near-center position on the trailer rear is a common starting point because it can provide a broad rear perspective with fewer immediate obstructions. The exact position must remain clear of doors, lights, liftgates, hardware, and other equipment, and the angle should match whether the main priority is backing, roadway context, or both.
Will a wireless backup camera work on a 53-foot semi-trailer?
Some long-range wireless systems may work across that distance, but trailer construction, cargo, sleeper-cab structure, antenna location, and RF interference can change real-world performance. Test the camera on the complete tractor-trailer combination rather than relying only on an advertised open-area range.
Can side cameras replace semi-truck mirrors?
Ordinary aftermarket side cameras should be used as supplemental views alongside the required mirrors. A camera can add selected side or blind-zone context, while mirror replacement requires equipment and installation that meet the applicable regulatory requirements.
What is the difference between a side camera and a blind-spot camera?
The terms can overlap. A side camera usually looks along the side of the tractor or trailer, while a blind-spot camera is aimed specifically at a difficult area such as the passenger-side curb zone, rear quarter, or another selected no-zone. Placement matters more than the label.
Is wired or wireless better for a semi-truck camera system?
Wired systems provide a dedicated signal path and work well for permanent installations. Wireless systems can reduce long cable runs and simplify trailer installation or swapping. Power requirements remain separate, and wireless performance must be validated on the actual tractor, trailer, and load configuration.
Final Thoughts: Build the Camera System Around the Whole Tractor-Trailer
A semi-truck camera system works best when it is designed around the complete combination rather than the tractor alone.
The trailer rear determines the true rear view. Tractor-side cameras can add selected left- and right-side context. Trailer-side or curb-side cameras can focus on areas that remain difficult to judge during turns, docking, or yard maneuvering.
From there, decide how many channels are actually useful.
A two-camera setup may be enough for rear plus one difficult side. Three cameras can provide rear, left, and right views. A fourth channel can be assigned to the fifth wheel, curb-side area, cargo, or another job-specific zone.
Then plan the signal and power architecture around the way the fleet operates.
A tractor that stays with one trailer can support a different installation strategy from a fleet that swaps trailers daily. Wired, wireless, and hybrid configurations each have practical uses.
Before installation, confirm:
which areas are still difficult to see with the existing mirrors
where each camera will provide a distinct useful view
whether the tractor and trailer electrical systems match the equipment
whether the wireless or wired connection works across the complete combination
how the monitor will display and switch between the selected views
Finally, test the cameras with the tractor and trailer straight, articulated, loaded where practical, and operating in the lighting conditions the driver actually encounters.
For a Class 8 truck, the useful system is not the one with the most cameras. It is the one that adds the right rear, side, and blind-zone views without complicating the driver's normal mirror scan and operating routine.
Depending on the model, it can record the road ahead and behind, display a live digital rear view while driving, switch to a reversing image when the vehicle is put into reverse, and support parking recording while the vehicle is stationary.
A mirror dash cam looks like a rearview mirror, but it can perform several jobs at once.
That combination makes the product quite different from a traditional windshield dash cam.
A conventional dash cam is primarily a recording device. It usually sits high on the windshield, records continuously while driving, and stays visually unobtrusive once installed.
A rear view mirror dash cam turns the mirror area itself into a large display. That makes the live rear-camera image much easier to use as part of everyday driving, but it also introduces new questions about screen glare, mirror compatibility, rear-camera placement, cable routing, and how the front camera is positioned.
The most useful way to understand a mirror dash cam is to separate its four roles:
recording, digital rear viewing, reversing, and parking monitoring.
Each one works slightly differently, and not every mirror camera supports them in exactly the same way.
Installation and recording reminder: Keep the display, cameras, and wiring clear of the driver's required field of view, airbags, controls, and safety equipment. Dash-cam mounting, audio recording, and parking-recording rules vary by location, so check the requirements that apply where the vehicle is used.
How Does a Rear View Mirror Dash Cam Work?
A mirror dash cam combines a wide digital display with one or more cameras and a recording system.
The mirror unit either attaches over the existing rearview mirror or replaces it using a vehicle-compatible bracket.
The rear camera is mounted toward the back of the vehicle and sends a live image to the mirror display.
Depending on the product, the front camera may be:
built into the mirror housing
mounted on the side of the mirror unit
detached and mounted separately on the windshield
That design choice matters because the front camera needs a stable view of the road ahead.
The Mirror Is Also a Screen
When powered on, the mirror can display the rear-camera image across a wide touchscreen.
This is often described as a streaming-media rearview mirror or digital rearview mirror.
The digital image can be especially useful when the normal optical mirror is partly blocked by:
rear-seat passengers
headrests
cargo
a small rear window
a high trunk line
Some mirror systems can also display the front camera or a split front/rear view.
When the screen is turned off, many replacement-style mirror systems can still function as a conventional reflective mirror, though the reflective appearance and brightness vary by product.
The Cameras Can Record While the Screen Shows a Live View
The live rear image and dash-cam recording are separate functions happening at the same time.
A typical dual-channel system can continuously record:
front road footage
rear road footage
Loop recording divides video into short files and overwrites older unlocked footage when the compatible memory card becomes full.
Important clips may be locked manually or through a G-sensor on supported systems.
Recording requires a compatible memory card, which is typically sold separately. Check the supported card type and capacity for the exact model.
A Reverse Trigger Can Change the Display Automatically
When reverse is selected, the system can switch to the rear camera and display adjustable parking guidelines on supported models.
Depending on the system, the reversing view may also shift downward to show more of the area immediately behind the vehicle.
The guidelines are visual references. They do not provide exact physical clearance measurements.
Simple way to think about it: The mirror screen is the interface, the front and rear cameras provide the images, and the wiring determines when the system records, displays continuously, or switches into reversing mode.
Mirror Dash Cam vs. Traditional Windshield Dash Cam
Both types of camera can record driving footage.
The main difference is how much importance the product places on the live display.
Feature
Mirror Dash Cam
Traditional Windshield Dash Cam
Main purpose
Recording + large live rear display
Primarily driving recording
Display
Usually large mirror-width touchscreen
Often small screen or screen-free
Placement
Rearview-mirror area
Usually upper windshield
Rear viewing
Can provide continuous digital rear view
Rear camera usually records rather than acts as the main mirror
Reversing use
Often supports reverse-triggered rear display and guidelines
Depends on model; many are recording-focused
Front-camera positioning
May be tied to mirror angle or use a detachable front camera
Usually positioned independently on windshield
Installation
Mirror mount + rear cable + power + possible reverse trigger
Front camera can be simpler; rear camera adds cable routing
Cabin appearance
Large display integrated around mirror position
Small dedicated camera on windshield
Advantages of a Mirror Dash Cam
The most obvious advantage is the screen size.
A 9- to 10-inch-class mirror display provides much more viewing area than the small screen found on many traditional dash cams.
That makes it easier to:
see the rear-camera feed
adjust the displayed camera angle
review footage on the device
use reversing guidelines
change basic settings through touch controls
The mirror location can also feel natural because drivers already expect rearward information in that part of the cabin.
A digital rear view can remain useful even when luggage, passengers, or interior structures restrict the optical line of sight through the rear window.
Replacement-style systems can also create a cleaner OEM-style installation because the display becomes the mirror assembly rather than an additional screen on the dashboard.
Where a Standard Dash Cam Has an Advantage
A compact windshield dash cam usually offers more freedom in front-camera placement.
It can be mounted where the windshield view is clear while the rearview mirror remains untouched.
That can be useful when:
the factory mirror has integrated electronics
several drivers adjust the mirror frequently
the vehicle has limited space around the mirror
recording is the main priority
you prefer a small device with no large live screen
Traditional dash cams can also be easier to hide behind or close to the factory mirror.
Mirror cameras are physically wider, so sun visors, overhead controls, sensors, and windshield trim should be checked before installation.
Integrated vs. Detached Front Camera Matters
Some mirror dash cams build the front camera into the mirror assembly.
When the driver adjusts the mirror, the front camera angle can change too.
This becomes noticeable in vehicles shared by drivers of different heights.
A detachable front camera separates those two adjustments.
The mirror screen can move to suit the driver while the front camera keeps the same windshield view.
For multi-driver vehicles, this can be a significant usability advantage.
Choosing shortcut: Choose a mirror dash cam when the large digital rear view is part of the reason you are buying the system. Choose a conventional dash cam when recording is the main priority and you want maximum freedom in camera placement.
How Recording, Rear View, Reversing, and Parking Modes Differ
One reason mirror dash cams can be confusing is that several functions use the same cameras and screen.
The system may show the rear camera all day, record it at the same time, switch to a different rear framing when reverse is selected, and operate in a separate parking mode after the vehicle is turned off.
These modes should be evaluated separately.
Driving Recording
During normal driving, supported mirror dash cams can continuously record front and rear footage.
Useful recording features include:
loop recording
front + rear dual-channel recording
G-sensor emergency file locking
night recording
date and time information
GPS speed and route data on supported models
Recorded footage may help document what happened around an incident, though a recording does not guarantee a particular legal or insurance outcome.
Continuous Digital Rear View
The rear camera can also act as a live digital mirror while the vehicle is moving forward.
This use case is different from reversing.
For continuous rear viewing, the camera is usually aimed to show:
the roadway behind
following traffic
lane context
The camera is typically mounted higher and aimed farther back than a close-range parking camera.
A wide digital mirror can offer a useful rear perspective when the cabin mirror view is obstructed.
Mirrors and direct observations remain part of normal lane-change and driving checks.
Reverse Camera Mode
When reverse is selected, supported systems can prioritize the rear feed automatically.
This mode may add:
parking guidelines
a lower rear-camera framing
full-screen rear view
This is where a mirror dash cam overlaps with a dedicated backup camera.
Camera position matters. A rear camera aimed mainly at traffic behind the vehicle may show a different close-range perspective from a camera mounted specifically for parking.
Some systems allow the displayed view to be adjusted so the same rear camera can serve both uses more effectively.
Parking Monitoring
Parking mode operates when the vehicle is stationary.
The exact behavior varies by product and wiring.
Depending on the system, parking monitoring may use:
impact-triggered recording
motion-triggered recording
time-lapse recording
another manufacturer-defined parking mode
Parking monitoring generally requires a suitable power arrangement while the ignition is off. Some systems use a hardwire kit or fuse-box connection with low-voltage protection.
Confirm the exact wiring requirement before assuming parking mode will work from a standard accessory socket after the vehicle is shut down.
Parking recording can capture useful context around an event. It should not be treated as a guarantee against theft, vandalism, or damage.
What Should You Check Before Buying a Mirror Dash Cam?
The large screen is easy to compare in product photos.
Compatibility and installation details usually matter more after the first week of ownership.
Mirror Mounting Style
Mirror dash cams generally use one of two approaches.
Overlay or strap-on systems attach over the existing mirror.
They can be easier to transfer between vehicles and require less disassembly, though the final unit can be larger and thicker than the original mirror.
Replacement-style systems remove or replace the original mirror assembly and use a compatible bracket.
This creates a cleaner integrated appearance but makes vehicle compatibility more important.
Before purchasing a replacement mirror, verify:
windshield mirror mount type
rain/light sensors near the mirror
factory auto-dimming electronics
compass or connected features
overhead controls
sun visor clearance
Screen Size, Brightness, and Glare
Mirror displays are much larger than most conventional dash-cam screens.
A 9- to 10-inch screen is large enough for easy touch control and a wide rear image, but the surface also occupies a prominent position in the cabin.
Look for:
anti-glare treatment
automatic or easy manual brightness adjustment
good daytime readability
comfortable nighttime brightness
a screen-off option when you prefer reflective-mirror use
Test the screen at sunrise, sunset, and night if possible. Those conditions often reveal more about real usability than an indoor demonstration.
Front and Rear Camera Resolution
Check the resolution of each camera separately.
A product described as “1080P” may use different specifications for the front and rear channels.
Also consider:
night performance
HDR/WDR support
field of view
frame rate
rear-camera weather resistance if mounted outside
Higher resolution can preserve more detail, but camera placement, lighting, lens cleanliness, and compression also influence the footage you actually get.
Rear Camera Installation and Cable Length
The rear camera creates most of the installation work.
For a passenger car, the cable may run through the headliner or trim to the rear window or exterior license-plate area.
For an SUV, pickup, or van, the distance can increase significantly.
Check:
included cable length
availability of an extension cable
interior vs. exterior mounting
weatherproof rating for exterior use
tailgate or hatch movement
reverse-light trigger wire routing
Vehicles longer than the standard cable specification need to be planned before installation begins.
Power and Parking Mode
Basic driving recording can often start whenever the mirror receives ignition power.
Parking monitoring may need a different power arrangement.
Check whether the product uses:
12V accessory power
USB power
fuse-box hardwiring
a dedicated hardwire kit
Follow the manufacturer's low-voltage protection and installation guidance so the camera does not create unnecessary battery drain.
GPS, Wi-Fi, and Footage Access
GPS can add location, speed, and route information to supported recordings.
Wi-Fi can make it easier to transfer footage to a phone on models that support app connectivity.
Many mirror dash cams rely primarily on the built-in touchscreen and memory card for footage review, so Wi-Fi availability should be checked rather than assumed.
If smartphone downloads are important to you, make that requirement part of the buying decision.
Buying rule: Screen size gets attention first. Mirror compatibility, rear-camera cable length, front-camera placement, parking-mode power, and footage access determine how convenient the system is after installation.
Who Should Choose a Mirror Dash Cam?
A mirror camera works especially well when the digital rear display has real value in addition to recording.
Vehicles With a Limited Optical Rear View
Examples include vehicles where the normal mirror is regularly affected by:
rear passengers
cargo
high headrests
a small rear window
dark rear glass
An exterior rear camera can provide a view that does not depend on a clear line of sight through the cabin.
Drivers Who Want Recording and Reversing in One Display
A mirror system can combine front/rear driving footage with the live rear image used during parking.
This can suit drivers who would otherwise need both a standalone dash cam and a separate reversing monitor.
If reversing is the only priority and recording is unnecessary, a dedicated wireless backup camera may provide a simpler installation.
Drivers Who Prefer a Clean Dashboard
The mirror area already occupies a central viewing position.
Replacing the factory mirror with a digital display can avoid adding another monitor to the windshield or dashboard.
This is particularly attractive when navigation, phone mounts, and other electronics already compete for cabin space.
AUTO-VOX Mirror Dash Cam Options
Product
Main Configuration
Useful For
T9
9.35" touchscreen, rear camera, dual-channel support
Drivers who want mirror display + backup camera + recording expansion
T9 Pro
9.35" touchscreen, front + rear recording, GPS
Front/rear recording with a detachable front camera
V5 Pro
9.35" mirror display, front + rear camera, GPS
OEM-style mirror replacement with integrated recording
Solar3A Plus
5" standalone monitor + rechargeable rear camera
Drivers who mainly need reversing without mirror-dash-cam functions
T9 combines a 9.35-inch touchscreen with a 1080P rear camera, loop recording, parking monitoring, night vision, and dual-channel support. The front camera for the dual-channel setup is offered separately.
T9 Pro is more recording-focused, with front and rear cameras, a detachable front camera, built-in GPS, loop recording, parking monitoring, and the same 9.35-inch mirror-format display.
V5 Pro uses an OEM-style mirror bracket, a 9.35-inch touchscreen, front and rear recording, Sony IMX307 imaging, built-in GPS, and adjustable parking guidelines.
Solar3A Plus represents the simpler alternative. It uses a separate 5-inch monitor and rechargeable wireless rear camera, making more sense when the main requirement is a live reversing view rather than front/rear dash-cam recording.
Prices and configurations may change. Confirm the current product page, mirror-mount compatibility, rear-camera cable length, selected camera package, memory-card requirements, and parking-mode power setup before purchase.
Frequently Asked Questions
What is a rear view mirror dash cam?
A rear view mirror dash cam combines a mirror-format display with one or more cameras and driving-recording functions. Depending on the model, it can record front and rear video, provide a continuous digital rear view, switch to a reversing display, and support parking monitoring.
Is a mirror dash cam better than a normal dash cam?
It depends on the main use. A mirror dash cam is useful when you want a large live rear display as well as recording. A conventional windshield dash cam is often more compact and gives more flexibility in front-camera placement. Recording quality and features vary by model in both categories.
Can a mirror dash cam work as a backup camera?
Many models can. A reverse-trigger wire can switch the mirror display to the rear camera when reverse is selected and show parking guidelines on supported systems. Camera placement and wiring need to support this function.
Does a mirror dash cam record all the time?
During normal driving, supported models can use loop recording whenever the system is powered. Parking recording works differently and may require hardwired power while the ignition is off. Check the specific recording modes and power requirements for the product.
Can I use a mirror dash cam when cargo blocks the rear window?
A rear camera mounted outside or near the back of the vehicle can provide a digital rear image that does not depend on seeing through the cabin. This can be useful when passengers, cargo, or the vehicle body restrict the optical mirror view. The camera still provides one selected rear perspective and should be used with normal driving observations.
Is a mirror dash cam difficult to install?
The mirror unit itself can be straightforward, while the rear-camera cable usually creates most of the installation work. Replacement-style mirrors also require a compatible bracket. Adding reverse-trigger wiring, GPS, parking-mode hardwiring, or a rear camera on a long vehicle can increase installation complexity.
Final Thoughts: Choose a Mirror Dash Cam for the Display, Not Just the Recording
A mirror dash cam becomes most useful when you want the rear-camera image to be part of everyday driving rather than footage you only review afterward.
It can combine several jobs in one location:
record the road ahead and behind
provide a wide digital rear view while driving
switch to a reversing image when parking
support parking recording when properly powered
The product still needs to fit the vehicle correctly.
Check the mirror mount, front-camera position, rear-camera location, cable length, display brightness, memory-card support, reverse trigger, and parking-mode power before installation.
If you mainly want driving footage and prefer a small, discreet camera, a conventional windshield dash cam may fit the job better.
If reversing is the main requirement, a dedicated backup-camera system can keep the setup simpler.
If you want recording, a large digital rear view, and reversing support in one display, a rear view mirror dash cam is the product format designed to bring those functions together.
Is installation of AUTO-VOX backup cameras complicated?
Not at all! Our products, including the Solar5, Solar4B, Solar3A Plus feature hassle-free designs like magnetic installation and wireless setups. These make it easy to install on RVs, trailers, and other large vehicles without professional assistance.
Are AUTO-VOX backup cameras compatible with all vehicle types?
Yes, Auto-Vox offers a wide range of products tailored to different vehicle types, including cars, trucks, RVs, trailers, and vans. For example, the Solar3C is specifically designed for large vehicles, while other models cater to standard cars and smaller vehicles.
How does AUTO-VOX ensure the product's durability in extreme weather?
AUTO-VOX products are built with high-quality, weather-resistant materials. They are designed to withstand extreme heat, cold, rain, and snow, ensuring reliable performance in all conditions.
What are the benefits of shopping with AUTO-VOX?
We offer free shipping across the US, 24/7 customer support, 100% secure payment, and a 30-day return policy to ensure a risk-free shopping experience.
How does AUTO-VOX support sustainable driving?
AUTO-VOX integrates sustainability into its product design. For example, the Solar3A Plus features advanced solar-assisted charging and power-saving technology, reducing battery consumption by 50% while maintaining excellent performance and reliability.
Why are EU/UK prices different from US prices?
EU and UK prices reflect local taxes, import duties, and shipping costs, which may cause differences from US pricing.